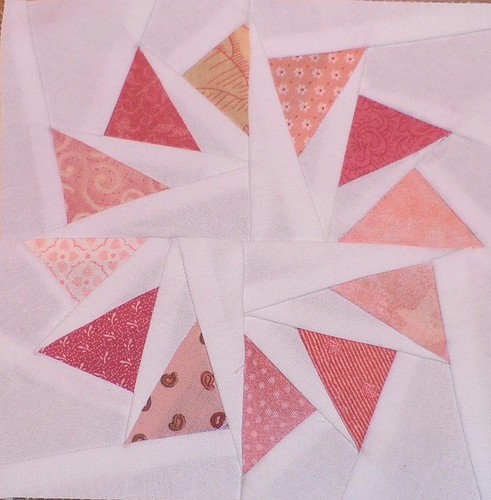
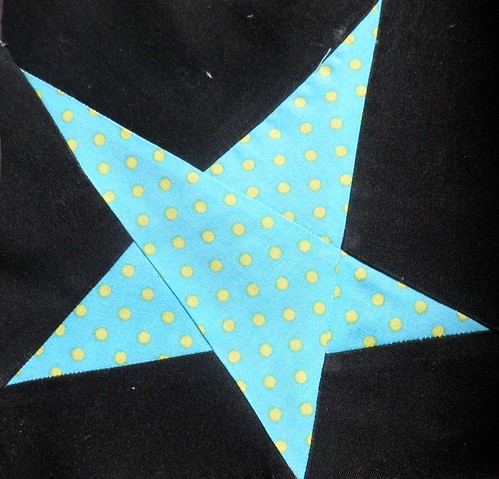
This is my block for the Scrapbuster Donation. I love quilting it is so much fun!
Thursday, June 30, 2011
Saturday, June 25, 2011
Scrapbuster BEE


Today I finished four more blocks for the Scrapbuster BEE.
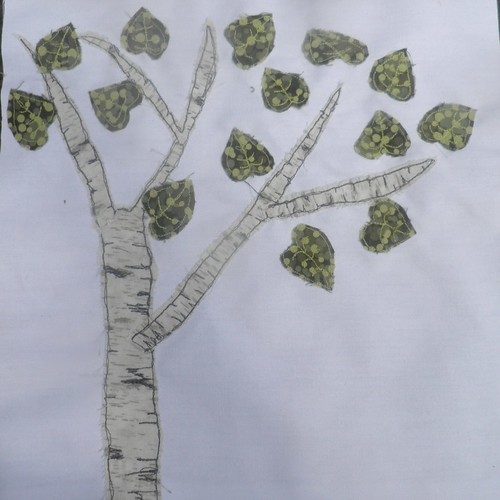
Now all I need to do is make a MOD TREE for the Bee host!
Now all I need to do is make a MOD TREE for the Bee host!


Friday, June 24, 2011
Two years after finishing the quilt, I finally finished up the pillow cases.
I finally finished up Sage's pillow cases. Another project done. I used the tutorial from http://www.mormonchic.com/crafty/pillowcases.asp. I even did french seams. Well I did them on three of five. I forgot on two of them!

Thursday, June 23, 2011
 The first block for my Flickr group Quilting Under the Rainbow is under way. Moni asked for us to do the Artistic Santa Ana block. She sent us the fabric and directions. Her suggestion was to make a sample block first so that if we made mistakes we would not use up all of the fabric needed to make her quilt. This was a great idea. She also gave us a Paper Piecing Tutorial she found online to use. This was a great help. So I went ahead and started my practice block today. This was a good thing since I did make quite a few mistakes. As suggested in the tutorial I traced my patterns. http://www.twiddletails.com/images/FPFtute/FPFTute.pdf
I then went ahead and picked out some fabric that I would use for my practice block.

These are the fabrics that I am using for the final block.
I added the purple and the red to the array that Moni sent.

I laid out the fabric after cutting it all per her directions.
I find it difficult that you look at the pattern backwards. Therefore this is where my mistake came in.


No problem with the first quadrant. However....

I accidentally did the A part of the pattern instead of the B
part and this did not work out. good thing I have more fabric!

Lesson learned I will line up before sewing.

That's better!

First half of the practice block finished!
A few more projects under way!
1. Mom's Birthday Present (May) Before the 4th of July it needs to be in the mail.DONE!!!!
2. Platter for weddings (One is in the Kiln other is not due till August)...the ceramic lady made a mistake on the first one so I have to start over!!!!! Picked up the paint ceramic lady said I need to get it back to her by next Friday,,,, so I better get hopping
3. Swap stuff one due each month (Placemat, Quilting Under the rainbow (working on it), Orange you glad)
4. add a border - no rush on my own time
5. Pillow cases for my son DONE
6. Teeny weeny Paper Bee - 4 due at end of June... Finished and Mailed!
7. Photo album for a wedding from last summer.
8. 3 pot holders.
9. Scrappy Bee 5 blocks due at end of July, plus a donation block one done
10. Advent Calendar for my nieces (partially done) Worked on it
11. Project for my sister in law... it is a secret
12. Christmas Presents?????
13. Weekly blocks for Skillbuilder Sampler! 6/17 done
14. Cross stitch project!!!!
15. Knitted Sweater... sure it won't fit anymore but should finish it!
16. Hem pants for Ben. DONE

This has been a fun summer so far. Lots of crafting. Lots of pool time. The circus with my two year old was a blast. We have been watermarking it and just riding bikes. I am really into the blog thing with quilting and crafting. I feel so grateful to all the bloggers out there that make the process so easy to understand. I need to get better at tagging my posts so people can find my blog as well. However, I think this new challenge will help me a bit. I, Shawn Schumacher, pledge to talk more about my processes, even when I can’t quite put them in the in words or be sure I’m being totally clear. I’m going to put my thinking and my gut feelings out there. I would like to do this not only with crafting and quilting, however with teaching and parenting as well. I have been having fun posting pictures of my son for my family to see. Since they are three states away they do not get to share the joys I have each and every day. So, I promise to share the process with them as well.
Wednesday, June 22, 2011
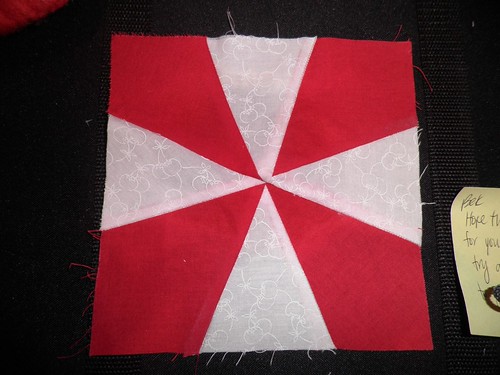
Block for Bek
Well I hope this works out for her. It took me awhile to get it close to right. I am not really happy with how it turned out. I am not stoked on the points in the middle.
Block for dreamfctry
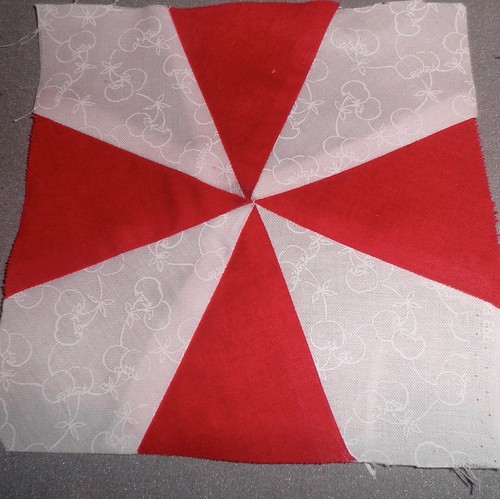
This is my first try on the Paper Piece pattern for Bek. Unfortunately I did not enlarge the pattern even though I thought I had. So all in all I have a new block for a pot holder which means I added another project to my list instead of knocking one off!

Sewn: We Can Do It! Sampler, Block 1 - Log Cabin
Sewn: We Can Do It! Sampler, Block 1 - Log Cabin: "Here we are at last!!! Week 1 of the We Can Do It! Skill Builder Sampler. This week we will make a log cabin block. If you are already fa..."
Okay so I should have measured at each step like you suggested so I know where I made my mistake. My block came out a little short. So what did I learn? Next time I am going to follow all of the directions and take the time to read. This is probably why I never dod well on tests. So I added some fabric to the end and will cut down the block when I need to. No big deal since it is just for me right? Thanks for the tutorial and I promise next week I will follow all of the suggestions.


Monday, June 20, 2011
One project Done

Mom's Mother's Day/ Birthday Table runner is done. Yeah. I will send it off tomorrow.
Friday, June 17, 2011
Quilting Madness and the WIP Challenge

Okay so I this morning decided on a few things. First of all a big challenge for me.
1. I can no longer use credit cards!!! Cutting them up! I am making a goal to buy nothing more on credit until I no longer have a credit card bill and maybe even then I will not want to anymore! This is going to be VERY DIFFICULT! However I am fed up and done.
2. I will pay off my current credit card over the next two years!!!!
3. Although I am a craft addict I am no longer able to buy anything new until I finish up all the current projects I have going and at least bite into some of the other projects I have already purchased in hopes to start at some time. A girl can only craft so much!
So here are the current projects I need to finish:
1. MOM's Table Runner

2. Kerstin's Platter

3. Meghan's photo from bachelorette party. Need two more signatures and the photo!
4. Meghan's wedding gift.
5. Anna's Birthday gift.
6. Lis's birth gift.
7. Jessie's gift.
8. Give a gift to a wedding I went to last year!
9. All the quilting projects that are due each month!
10. Stop adding more projects.
Fabric for We can Do it Skill builder
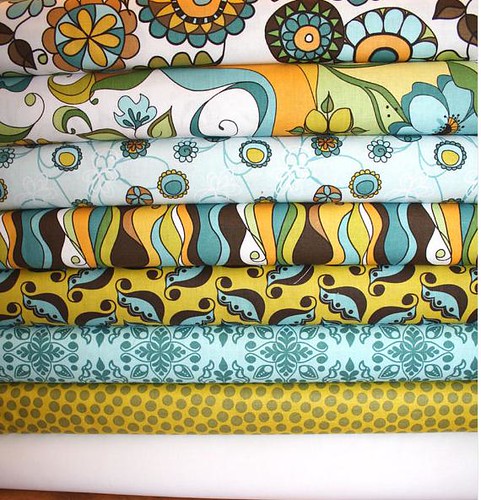
This is the new fabric that I have chosen for the Skill Builder Quilt Along. I am really excited to get started. It starts today I think!
Tuesday, June 7, 2011

Trying to Learn How to Make Blog Buttons
Over the past few months I have been trying to make a blog button; however have not been truly successful. I am giving it another try with the help of one of my quilting friends.
Buttons | |||
Here is where I began to make the button: www.shortpumppreppy.com/2009/06/you-make-your-own-cutest-ever-blog-buttons-for-free/ I am a Mac user, so I used SeaShore to make my orange background. I didn't have a photo or any clip art to use, so after I did the background, I used Picnik for the text and the tree. This tutorial explains using Picnik pretty well. You must make an account here, if you don't already have one. (It's free!) www.picnik.com/app#/home/welcome Once the button looks the way you want it to, you must save it to your computer. I'd recommend saving it to the desktop, so it is easy to find. This next part is what freaked me out, you have to save the button to the internet. Well, I was baffled! This page explained it very nicely: a-heart4home.blogspot.com/2009/04/blog-button-with-text-box-for-code.html First you need to upload your button to Photobucket. Again, you have to register here, but it is free. photobucket.com/ In the third paragraph of the tutorial you'll see this : "(for more information on how to get a web address for your button click here). " Click that word, 'here', and it explains how to get the location on the internet of your blog button that is now stored in Photobucket. Now--open up a Word Document (or whatever word processor you use) and copy and paste that code from Photobucket into a document. You'll need to use it a couple times, and it is much, much easier to cut and paste than to try and type it out! After you have done this, the fourth paragraph of the tutorial looks like gobbledy gook, all that HTML code, you need to cut and paste that into your word document, too. Once you have done that, follow the directions to cut and paste your blog address (or flicker address) into the code, and you will do the same thing with the location code for your button. Once you've done that in your word document, save it, and next you'll be opening up blogger. When you open up Blogger, go to the the DESIGN tab. Click on "ADD A GADGET" on your side bar. When the new menu pops up, click the + next to "HTML/JavaScript". Add a title, such as "Grab our Button" to the title box, and then go back to your word document. Copy and paste that HTML code into the box and hit SAVE. Then save your changes to your blog, and take a look at it. The new button with the code below should appear on the blog. Click the button to make sure it takes you where it is supposed to go. It isn't as hard as it sounds when you break it down, but there are a lot of steps. I'd be happy to help you as you work your way through the process. I think between the two of us, we can get your all fixed up! Please feel free to ask me any questions you'd like. |

Subscribe to:
Posts (Atom)